
More and more people, even in urban areas, are interested in having their own insect hotel in the garden. This attracts beneficial insects of all kinds, from wild bees to lacewings and butterflies, to settle in the garden and pollinate nearby plants and provide food for other animals such as birds. Even children are delighted when the hotel attracts insects that can be observed, providing an interesting insight into nature.
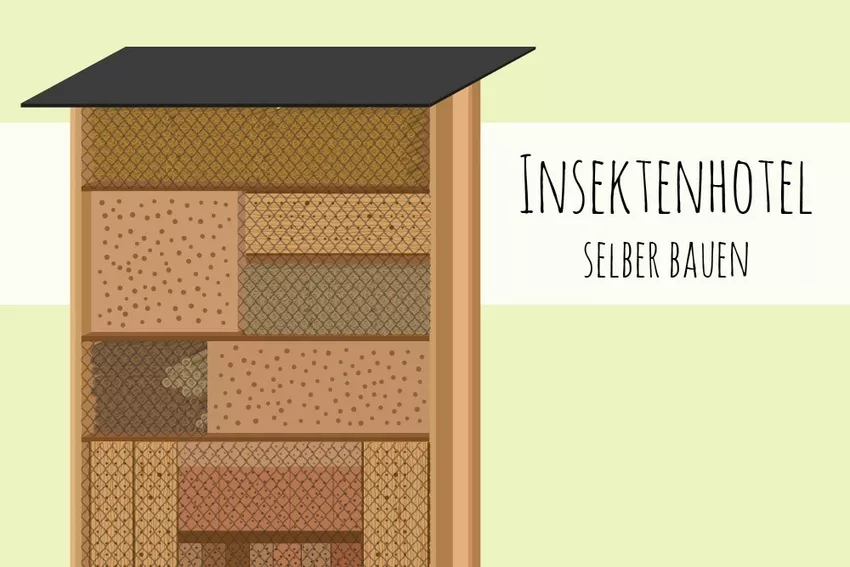
insect hotel
Which beneficial insects move into an insect hotel?
Insect hotels are primarily used to settle useful insect species on your own property. This will give you a nesting aid offered, in which they can easily reproduce without being disturbed by humans and even find shelter in the city. The following species like to settle in the self-built hotels:
- wild bees
- bumblebees (rare)
- butterflies
- parasitic wasps
- Solitary wasps
- digger wasps
- spider wasps
- ladybug
- fireflies (rare)
- fire beetle (rare)
- lacewings
- catchy tunes

The big advantage: The creepy-crawlies have an effective effect on the immediate environment, i.e. the vegetation of your neighbors, forests, fields and even city parks. Wild bees and butterflies are particularly welcome as they are among the most important pollinators. If you're lucky, you might even see fireflies, which eat numerous species of snails and glow at night with their abdomens.
location
Since this insect hotel is two meters high and one meter wide, you will need enough space. But that's not the most important thing in terms of location for the insect hotel. The animals need an incentive to settle near you. For bees, bumblebees or butterflies, for example, these are trees, flowers and other plants that form blossoms and thus serve as a source of nectar and pollen. For ladybugs, fireflies or fire beetles, on the other hand, prey animals are the incentive to move into the hotel. Locations with the following characteristics offer good conditions:
- well stocked beds
- near greenhouses
- natural gardens
- lots of vegetation
- wooded areas nearby
- natural green spaces nearby
If you live right in the city, don't have a lawn or terrace available and want to build insect hotels, only a few species will settle. The more extensive the range of green spaces and vegetation, the better, since the welcome beneficial insects depend on them. So think carefully about which location is best for this. For example, if you plant fruit trees and roses, you will be amazed by the number of bees and butterflies that roam around the hotel.
tip: Beneficial insects settle particularly easily if you only weakly or not at all control pests such as aphids during the first half of spring. The pests can multiply accordingly, giving the beneficials a veritable banquet.
materials and tools
Implementing an insect hotel is not difficult. However, the material used is particularly important, especially the wood. Since insects are easily damaged by chemical and even some natural treatments, you should only choose natural wood. This should not be or will be treated in the following ways:
- painted with pesticides of any kind
- varnished impregnated with solvents
- Glazed with chemical wood preservatives
Only natural oils or waxes may be used to make the spruce wood more weatherproof. The following are particularly suitable for this:
- beeswax
- linseed oil
- olive oil
- sunflower oil
Otherwise you should not protect the wood. The following list gives you an insight into the materials and tools you need for the construction project:
- 2 x squared timber measuring 1,800 mm x 80 mm x 80 mm
- 5 x rough-sawn boards measuring 1,000 mm x 200 mm x 24 mm
- 2 x rough-sawn boards measuring 1,800 mm x 200 mm x 24 mm
- 1 x rough-sawn board measuring 1,400 mm x 600 mm x 24 mm
- 1 x wooden strip measuring 1,000 mm x 50 mm x 24 mm
- roofing felt
- chain-link fence
- 2 x impact sleeves measuring 91 mm x 91 mm x 750 mm
- self-tapping screws made of brass or stainless steel in lengths of 50 and 70 mm
- Screws made of brass or stainless steel, if a drill is available, in lengths of 50 and 70 mm
- Drill or cordless screwdriver
- saw
- Nails (galvanized) for roofing felt and chain link fence
- hammer
- screwdriver
Since the individual nesting aids do not weigh much, you do not have to concrete the impact sleeves unless your ground is not stable enough. Alternatively, you can omit the squared timber as posts and place the hotel on an extra block of wood or stone. All you need is some pond liner to cover the bottom so that the spruce wood doesn't get completely soaked.
Suitable nesting material
The material for the breeding grounds of the animals is particularly important in the construction of the hotel. For example, wild bees nest in completely different materials than ladybugs or earwigs. If you want to build an insect hotel, you should make sure that the different materials do not give way to competing animal species. For example, materials for earwigs and bees should not be housed together in an insect hotel, because earwigs are pollen thieves.
For wild bees and butterflies
plant stem
Typical habitats of wild bees are the stalks of various plants, such as reeds, bamboo and lilacs. They use these as breeding tubes. The ideal diameter for this is 3-6 mm. They are cut to the appropriate length of maximum 15 cm and stacked in the compartment. Make sure the cut surfaces are clean and smooth, otherwise the bees could injure themselves.

tip: Smooth the entrances of the brood tubes with some sandpaper. So the insects prefer to colonize the accommodation.
thin branches
If you stick thin branches with a diameter of approx. 5 mm into the compartments, butterflies will feel right at home. Simply use the branches to build a home for the beautiful winged creatures by leaving enough space in between.
hardwood
Hardwood is often used for wild bees, wild wasps and, rarely, bumblebees. For example, apple or pear wood are suitable for this. Drill numerous holes in the hardwood and the flying insects will colonize it in a short time.
Best of all: hardwood can be easily sawn into shape and used perfectly in the insect hotel.
tip: Drill the holes of different sizes and distances. These should be drilled from the bark side and not into the end grain, i.e. into the annual rings. This prevents cracks and splinters in the brood tunnels. Cracks in the wood allow moisture to enter easily and form a target for fungi and parasites, which can kill off the entire brood.
bricks
Bricks made of mud or clay are perfect for the insect hotel. Clay bricks are interesting for wild bees, while clay bricks are suitable for all kinds of insects. Drill the beginnings of holes in the mud bricks, which the bees then widen on their own.
tip: Avoid perforated and hollow bricks without additional fillings. Their holes are too large and are not colonized by most insect species. They are only suitable for storing hollow stems and branches.

Nesting material for earwigs, lacewings and beetles
wood wool
Dry, untreated wood wool is perfect for lacewings, ladybugs and earwigs, as they can lay their eggs there.
straw
You can use dry straw to attract earwigs in the same way as with wood shavings.
leaves
Completely dry Foliage works like straw and excelsior, but magically attracts ladybugs, firebugs and fireflies. Never use wet foliage as this will quickly lead to mold and can destroy the entire brood.
cones
If you want to attract earwigs, lacewings and ladybugs, collect pine and fir cones and place them in a tray. The larger the cones, the less wire mesh is needed to keep them from falling out.
bark mulch
Bark mulch is ideal for beetles. Simply put a handful of dry bark mulch in one of the compartments, close with a wire mesh grid and they have a home.
tip: If you would like to accommodate a large variety of insects in your garden and do not want to set up 2 insect hotels, individual housing is a good choice. Beneficial creatures such as ladybugs and lacewings, for example, are happy about clay pots filled with straw or cones. Secure the materials in the clay pot or box with rabbit wire or non-toxic glue and hang them upside down in the garden.
Build an insect hotel yourself: instructions
After you have decided on the division of the compartments and have procured or borrowed the material and tools, the construction begins. It's best to choose a dry day if you don't have a garage or covered space to build. Also is a rainless Tag recommended for placing the ground sockets. You can do the construction yourself, but a helping hand is always welcome. Children like to help, especially when filling the compartments. Follow this guide to build the hotel:
1. Build the basic structure
First the basic structure is built. To do this, take the two boards with a length of 1,800 mm and another two boards with a length of 1,000 mm. From this you build a classic, rectangular frame. To do this, screw them together so that the 1,000 mm long boards are on the inside. Use 50 mm long screws for screwing.

2. Set subjects
Now insert the remaining three boards with a length of 1,000 mm into the frame. Depending on how high the individual compartments are, screw the boards together. Of course you can always screw a board at 60 cm if you want it in order. Also use 50 mm screws for this.

3. Mount the roof
Next up is the roof. To do this, use the wooden strip and mount it from below using 50 mm screws. You can choose whether the roof slopes forwards or backwards, depending on which side you mount the bar. This is screwed from below with at least two 50 mm screws.
Before you screw this on, you have to bevel the strip a little to allow an angle of 15° to 20° for the roof. This is the only way the water can drain away. Place the batten on top of the framework and use the roof panel (plank 1400mm long) as a gauge to find a suitable angle. Draw this in and saw off the corresponding piece.

After the bar has been mounted, the roof panel is placed in such a way that it protrudes sufficiently on each side. Take 50mm screws and attach the roof.
Cut a piece of roofing felt so that it can be wrapped around the sides of the roof and then nailed in place.

4. Fasten ground sockets
The basic framework is now complete. Take the two ground sockets and drive them into the ground at a distance of 108 cm. Depending on the soil, you may need more force or a hammer to do this. They should protrude 20 cm from the ground to provide sufficient support.
After you have driven the ground sockets into the ground, the squared timber is fastened with screws. Make sure that the ground sockets are anchored firmly enough in the ground after this step. If not, help with dirt, gravel and stones.

5. Fasten the basic structure
Take the basic structure and screw it to the squared timbers over the side walls. The 70 mm screws are used for this, which are drilled from the inside through the side walls into the squared timber. Here you should use screws at regular intervals to increase stability.

6. Fill compartments
Then the compartments are filled. As described above, individual "apartments" are equipped with wire mesh if they have been filled with leaves or pine cones, for example. To do this, cut a piece and attach it to the front and back. Hollow stems and branches should also be secured. Because they like to be pulled out by hungry birds. So attach them with wire or glue them to the rear end.

Now the insect hotel is in place and, depending on the location, more or fewer insects will settle, which will please you, your children and your plants. Of course you can build the hotel according to your own dimensions and ideas. This guide uses a cheap and effective way to build an insect hotel yourself and place it in your garden. However, there are no limits if you want to build an insect hotel yourself.
tip: Alternatively, as a hotel, you can use a frame made of spruce wood, which has a depth of 20 cm and is not closed at the back. This is then subdivided with additional panels, filled with nesting material as described in the instructions and placed in a covered area so that no moisture can collect in the individual "apartments".